Showing posts with label cage-free eggs. Show all posts

Monday, March 23, 2015

Stuffed Shells- Freezer Meal Edition

Stuffed Shells

I am so excited about making freezer meals. A few of my friends are attempting a new freezer meal group later this week where each of us chooses a recipe, makes enough for each family that attends, and then we will swap meals at the end. Because I am hosting it this time, I wanted to get mine done early, so I can help others work on theirs while they are in my home. Freezer meals create a sense of peace in me. Weird, I know, but when I know that I have a head start on dinner for the next several days (or even WEEKS!), I can face the difficulties of the day with more confidence. Other freezer meal bloggers talk about how they like to fill their freezers with their meals and then go peek at them from time to time. I may or may not do that. Don't judge. Here's a detailed depiction of why freezer meals are important for our budget.

Stuffed Shells have a lot of steps in the process, but none of the steps are difficult. I made this recipe knowing that I needed to make enough for six young families. The families have as few as three members and as many as five in the largest, so I wanted to be sure to include enough shells for a family of five (two adults and three children) to have a dinner entree.


The first step in my process was to make a big batch of meat sauce. I used  Ree Drummond's recipe for meat sauce as my basis for my concoction. 


I did stray a bit from her recipe because I don't keep wine in the house, and I used a mixture of local raised beef and local raised pork sausage instead of all beef. I am not a fan of onions, so I finely chopped some fresh zucchini, fresh yellow squash, and some red peppers that I found in the freezer. I forgot the bay leaves too. The sauce still turned out great. This makes A LOT of sauce. Seriously, it starts with FIVE POUNDS of meat! 

On with the shells. I cooked three boxes of shells in a large pot of boiling water, to which I added salt and a bit of olive oil to prevent stickage. (Is stickage a word?) Once the shells reached a perfect level of done-ness, I took my whole pot of shells, poured off most of the water, then I turned the cold water on and let the shells cool completely.


While the noodles cooked, I made a lovely filling for my shells. I grated a whole bunch of Parmesan cheese and mixed it together with eggs, ricotta, cottage cheese, shredded mozzarella, and several lovely dried herbs- parsley, basil and lots of oregano.


 Here's how the pretty herbs look poured on top of the ricotta.


 And the mozzarella...


 Here it is all mixed up together. It smells lovely at this stage, but resist eating it unless you fear no salmonella from raw eggs.


Next, we stuff them. I scoop about a tablespoon of the mixture and spoon it into the cooked shells. Then I close them and lay them seam side down.


Three boxes makes A LOT of shells. My kids seemed concerned about my sanity when I counted them... there were 120 to be exact. All the other shells broke apart and I couldn't stuff them.


Next, I added a layer of wax paper to an 8"x 8" foil pan because I have heard that tomato sauce can react with different types of metal. I'm not sure if it would happen with these, but I knew how many of these pans of shells I was planning to make, and I don't have time for an experiment to go awry! I added a couple of spoons full of sauce to the bottom of the lined pan.


Next, I took the pretty filled shells and lined them all up in rows. I fit 18 shells in each pan. Aren't they pretty?


Here's when the meat sauce really gets showcased! Scoop enough on top of the shells to cover them generously. These are going to be baked at a later date, and noodles that get crispy in the oven are not my favorite. 


Smooth out the sauce like so.


Here they all are in their beauty!

This step is exceptionally important. Truly. Labeling bags saves so much time later on! I like to include what is in each bag, instructions for cooking, the date it was made, and the cook's name too. These 8" x 8" foil pans fit nicely in a gallon size freezer bag.


Before the ladies arrive later this week, I will prep sandwich-sized bags with shredded mozzarella to top these yummy pans full of pseudo-Italian goodness and send them home to stock their freezers. I am looking forward to staring into my freezer knowing that we are working together to get a head start on the responsibilities of dinner for the coming weeks.

Sauce:
3 lbs ground beef
2 lbs sausage
2 T minced garlic
2 c minced veggies- zucchini, yellow squash, red bell pepper about 2/3 c each to total 2 cups
6-8oz cans of plain tomato sauce
2 jars of good spaghetti sauce
1 can of diced tomatoes
1 T oregano
1 T parsley
1 t ground thyme
1 t basil
1 T salt

Brown meats in a large pot. Drain and set aside. In the same pot, add veggies and garlic and cook on medium for about 3 minutes. Pour in tomato sauce, spaghetti sauce and tomatoes. Add seasonings and bring to a low simmer. Add browned meat back to pot and simmer on medium low for about 1 hour, stirring occasionally.

Stuffed Shells:
3 boxes of jumbo pasta shells
5 containers of ricotta
1 large container of cottage cheese
1 lb shredded mozzarella
3 c shredded Parmesan
4 eggs
1 T parsley
1 T oregano
1 t basil

Cook shells according to package directions. Cool. Mix all other ingredients together in a large bowl. Spoon 1 T mixture into each shell. Ladle meat sauce into a baking dish. Place each shell mixture-side down into baking dish. Once your dish is filled with one layer of shells, top with a generous amount of meat sauce.

From this point, you can bake them at 350 for 35 minutes and top with extra mozzarella cheese and bake another 5 minutes. If you want to freeze them, pack for freezer and label. Freeze for up to two months. When you're ready to use, thaw and bake at 350 for 35 minutes and top with extra mozzarella cheese and bake another 5 minutes.

Yield: seven 8" x 8" baking dishes of shells and sauce with a little extra sauce left over. 

I got 120 shells from this recipe for an approximate cost of $50 (including pans and bags); that's about $7.15 per baking dish.



Sunday, March 15, 2015

Making the Lego Cake

The subject of my last post was my daughter's homemade Lego birthday cake. It was nothing fancy, but it helped our family cut our a lot of expense that our family deemed unnecessary (that may or may not ring true for your family about cake.) Last year's cake cost more than $50, and I had to drive more than 60 miles round trip to get it. This year's cake cost less than $12. Yes, there was a major difference in the professional appearance of the tasty treat, but with a savings of more than $38, I decided that was a sacrifice I was willing to make.

Here's how I made a delicious three layered birthday cake:

I bought cake mixes on sale for $1 per box. I prefer golden yellow cake and a lovely chocolate layered together. I also bought four containers of pre-made icing, one chocolate and two cream cheese flavored white icing.

I baked the cakes per the directions on the back of the boxes with the following exceptions:
I used jumbo  farm fresh eggs instead of large eggs.
I used melted butter in place of oil.
I topped the yellow cakes with sprinkles before they went into the oven.

The batter from each cake went into 8 1/2" round cake pans that I got from the Dollar Tree, two for $1. At one time, I had four round cakes baking nicely. After they tested "done", I let them cool completely. Not almost. Completely.

Once cooled, I turned the first yellow cake out on to the round cake board and topped it with about half of the container of chocolate frosting. I smoothed it with an offset spatula and created a level spot for the chocolate cake. I turned the chocolate cake out into my hands and placed it carefully on top of the chocolate frosting pillow I had just created. Chocolate frosting went on top of this layer too. Next, I turned the last yellow cake out into my hands and centered it on top of the other two carefully.

Once the layers were together, I took some bamboo skewers, cut them to the appropriate height, and I pushed them down through the center of the cake to act as reinforcements. You could use drinking straws too. Be sure to get them back out before serving your cake!

Next, I cleaned of the excess chocolate icing that was trying to push its' way out the sides of the cake. You can do what you want with this icing. I may or may not have licked mine and had to wash the spatula before I could continue.

The pre-made icing wanted to be a bit cantankerous with me, so I stirred it really good before I tried to spread it on this delicate cake. I started with about half of one jar across the top. The crumbs really wanted to come off and make the cake look all crumbly, even though it isn't. So I gently spread the icing across the top and sides of the cake until it was all covered in white, leaving about a half of  a container to pipe on with a piping bag. I wish I had a bit more icing to do another layer to completely cover the cake again, so I learned something for next time.

Next, I filled a piping bag fitted with a star tip with white icing, and I began adding a bead of icing at the base where the cake met the board it was sitting on. I iced it all the way around. Then I did the same thing around the top edge. I am not good at this part.

Next I made some Lego Movie accessories out of stickers from this book to put on top of the cake.

I sandwiched toothpicks between Lego Movie stickers and construction paper to create little accessories. 


Next, I used scissors to cut them out. Then I went into my kids' playroom, grabbed some of the Lego people we already owned, washed my kids' germs off of them, and placed them on top of the cake. I went back and built a number 6 out of blocks too and placed the pieces on top of the cake.


I piped her name on the front of the cake using some leftover black sparkly gel from my post titled Lego Birthday on a Budget. Not too shabby results for saving more than $38 on party cake.

The best part is that my daughter loved it. The second best part was that our guests loved the flavor of the cake.

As a side note: I baked four round cakes but only used three for this layered recipe. I had planned to ice the other one and have it on hand if we ran short on cake, but life happens. My daughters found it on the counter, reached up and grabbed hands full of cake, and ate it as quickly as possible while running away from the scene of the crime leaving a trail of chocolate evidence on their path.

Teach me to do thy will; for thou art my God...
Psalm 143:10

Monday, March 2, 2015

Comfort Food Sausage Gravy and Biscuits!

Biscuits and Sausage Gravy

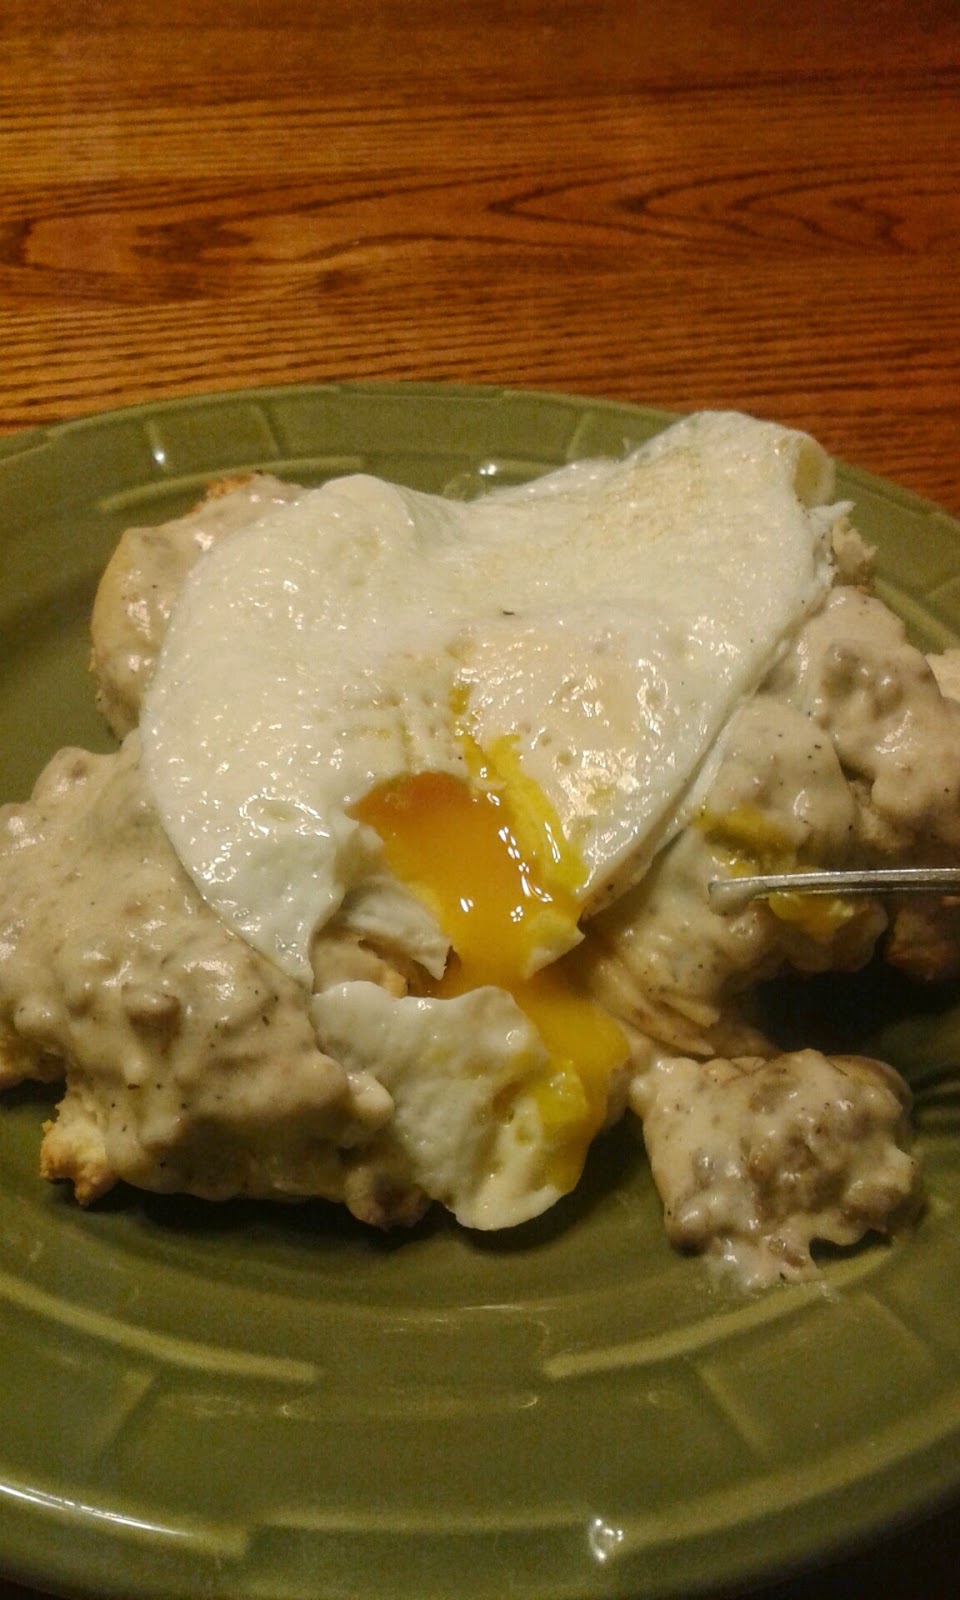
My husband LOVES breakfast foods. I think he would eat breakfast for every meal if that was an option. One night last week, I asked him what he wanted for dinner, and he wanted to go to the restaurant downtown to get breakfast for dinner, but I knew we didn't have it in the budget to eat out anywhere other than fast food, so we ended up getting burgers instead. To make it up to him, I decided that we would have his favorite breakfast over the weekend: biscuits and gravy with an egg on top. My gravy skills have evolved over the course of the last decade since my husband and I started our marriage. Back when we got married, I couldn't make any kind of gravy that anyone would want to eat. There were several occasions in my self-taught gravy course when the concoction in the skillet got scraped out because it was not fit for human consumption. Our dog wouldn't even eat it! Over the years though, I have figured out some tricks from watching seasoned gravy makers (did you see what I did there? seasoned? Ha!) and have put some ideas into practice to get good gravy every time!


First things first. Biscuits. For this application, I just made biscuits according to the instructions on my mega size Bisquick box. I encourage you to use your favorite biscuit for this application. I really like this recipe for 7-Up Biscuits too.


Drop the dough on the baking sheet in spoonfuls. You could roll all of this out with your rolling pin and cut it into pretty round biscuits if you want, but I had places to go and people to see, so I did drop biscuits on this occasion. It only changes the texture of the finished product; the taste remains the same.


 Bake until golden and set aside until the gravy is ready to slather across the top of these pillow-y delights.

Now, gather up your ingredients for gravy.
I am very picky about sausage for sausage gravy. I have tried many different varieties of sausage, and the flavors of Bob Evans sausage or Jimmy Dean are the only ones that I like for this application. When I make this for our family of five, I try to use only half of the sausage in the package so I can make this recipe twice in the course of one trip to the store.

Ingredients: 1/2 lb Bob Evans or Jimmy Dean breakfast sausage
3 T of all purpose flour
12 oz can of evaporated milk
1 cup whole milk
salt and pepper to taste


Brown the sausage in a large skillet over medium heat. If you start getting too much color, turn your heat down. All of those bits of yummy goodness in the skillet become part of your gravy and can change the color of the gravy. The gravy should be a white color when you're finished.


Once the meat is cooked through, there should be some oily, greasy, fat shining in the skillet. This is important: do not drain it. You want the fat to get well acquainted with the flour you are about to sprinkle all over the skillet.


Stir the flour all around, and let it gently cook in the skillet for about two minutes. It should turn into a sort of paste as it combines with the fat from the sausage. I like to start the seasoning process now. I add quite a bit of black pepper at this point, probably close to a teaspoon. Once the black pepper hits the skillet, the aroma of sausage gravy really starts to waft through your house and wake people who are sleeping. I add about 1/2 teaspoon of salt now too. If you're feeling extra bold, add a couple of sprinkles of rubbed sage at this point too.


To the hot skillet, you will add both kinds of milk while stirring vigorously with a wooden spoon or a whisk while keeping the heat at a medium low. Stir constantly to avoid lumps.  The mixture will be pretty thin at this point, but you need to keep your heat at low to medium and patiently keep stirring. Turning your heat up to make this process go faster will risk scorching the whole batch.


As it starts to thicken, the mixture will stick to your spoon.


When it is ready the gravy will have a shiny look in the skillet, and it will be thick on your spoon.


 When it reaches this stage, it is ready to be spooned over the luscious biscuits. This makes enough gravy for each member of our family with none to spare. I don't like how this gravy reheats, so I try to only make what we will use in one meal. My husband likes to eat his with an over-medium egg on the top, so that's what I made. He's my favorite in the whole wide world.


Psalm 34:8 Taste and see that the Lord is good; blessed is the one who takes refuge in him.